Gorgeous Debora the Cutting Board's Identical Twin Sister - Design Tech Project
What is the project?
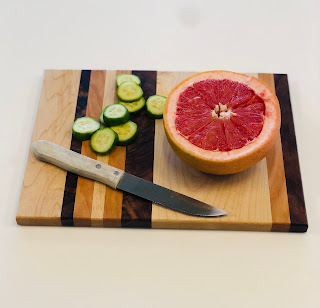
Our project was to design and craft our own cutting board, using both our hands themselves and machines to assist us.
How did you make it?
The first step was to design what we wanted our board to look like on a piece of paper. We included a cut list and a purchase list of the wood we would need. When the wood arrived, we immediately got to cutting it, using our design measurements for reference. We used the table saw for this step. Once everything was cut, the gluing began. We glued the strips of wood in the preferred order and then proceeded to clamp the pieces together until the glue dried. When the glue had dried, we got off the excess glue and put the long board through the planer (at this point we hadn't cut the board in half to make two boards). The planer sliced off a small layer of the board, making it very smooth. We then cut it in half, producing two boards. The next step was to sand it until it was even smoother and then rout it. This means rounding the edges of the board. We sanded it some more and then moved on to finishing oil. We put a first coat of oil and then waited for it to dry. When it was ready, we polished it with steel wool to maximize smoothness. After a second and last coat of oil, we're done!
What do you like most about it?
I really like the design we chose and how the colors compliment each other.
What was a challenge you encountered?
The steel wool kind of got everywhere which was frustrating.
What would you change about the project if you were to do it again?
I would try to rout the edges a bit more even though it was hard because my wood was a bit warped.
What is your plan for it now that it is done?
To put it to use! While it would make good decoration it would serve a more practical and useful purpose if we actually use it.


Comments
Post a Comment