Posts

Showing posts from December, 2022

Personal Kitchen cutting board - design tech project

Image
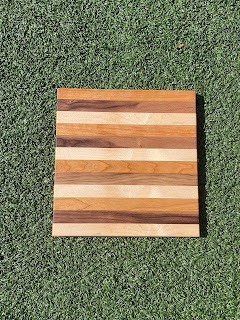
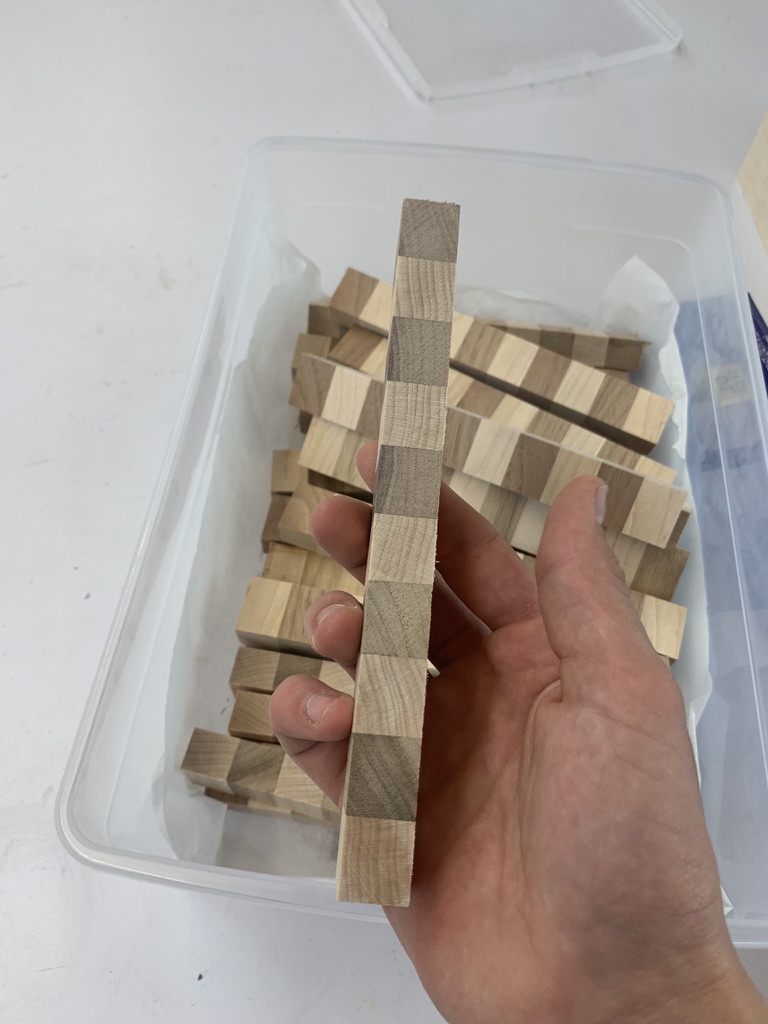
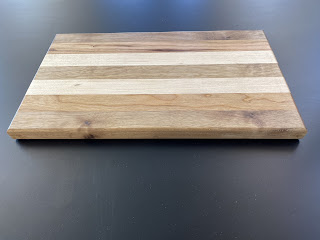
For this project I made a cutting board. We started by paring up into partners. Next, together with out partners we sketched a design for our cutting boards including the pattern dimensions and type of woods that we will use. After that we cut our different pieces of wood into the strips we need using the table saw, and glue the pieces together in our chosen pattern. After the glue dries we put our wood into the planer to make sure everything is smooth and even. And back to the table saw it is to cut the edges so they all line up and divide the board into two different cutting boards for each of us. In this next process we use the router to create an edge of our choice, for my cutting board I decided to round all of the edges. Then it's time sand. Once we are done sanding we varnish our pieces of wood and let it dry. Once done drying we vernish our pieces of wood with metal wool, this makes our pieces of wood feel softer. after that were done. This was my final product.  My favorit

Ac Milan soccer coasters and coaster holder - design tech project

Image
     The project that I created in Design tech this semester is a set of 6 coasters and a coaster holder designed around the current Ac Milan soccer club and their players.      All of the coasters are made of maple wood. This was made by creating the designs for these coasters on Adobe illustrator. After the designs were made we preceded to prepare our wood. This was done by choosing the right size and type of wood that would fit all of the designs on it, then taping the part of the wood that would be cut and engraved by our lazer cutter. This prevented any burn marks appearing on our designs. We then took our designs and plugged them into the lazer cutter that would read them then cut and engrave our wood. afterwards we took the leftover tape off. These were my finished coasters.      T o make the coaster holder we went through a similar process. we started by making the shapes of our pieces on Adobe illustrator and plugging them into the lazer cutter. The lazer cutter would then cut

planer stopping jaw dropping super amazing cutting board

Image
I made an end grain cutting board, now you might be thinking wtf is an end grain cutting board? It is a cutting board that is made out of a certain type of cut of wood. to begin there are 3 types of cuts, face grain, side grain, and face grain. face grain wood is commonly known as a piece of wood that is larger when you are looking at a plank, so it's the side that you would normally lay down facing the ground. side grain wood is the type of wood that is on the side of a plank, and the end grain is the stuff with all the little wholes in it, that is to say, when you look really closely at it you can see the holes that the tree used to transport water/nutrients to its upper bits. the end grain is the best type of cutting board to make because it is the best at keeping your knife sharp and is also the coolest looking (in my case at least). But how do you achieve the type of end grain cutting board I did, you first cut all boards lengthwise and glue them together one after the other s

He Didn't Make the CUT- Design Tech Cutting Board Project

Image
  For this design tech project, I made a cutting board that's 8 inches by 12 inches, and  3/4 of an inch thick. The cutting board is made out of 3 different types of wood maple, cherry, and walnut. We had a 24 in long board of each. Eli and I worked together, so we first cut our boards into 1-inch strips, and we were able to get 4 strips out of each board. Next we glued the strips together in the pattern of maple walnut cherry and repeated. We clamped the boards together and let them dry overnight. Then we scraped off any leftover glue and sent the board through the plainer to smooth off the top and bottom so it would be a flat surface. Next, we used the table saw to cut the big board in half so there be a cutting board for me and one for Eli, we also cut off the ends so they'd all be the same length. Then I used the router to round the edges of my cutting board making the board easier to pick up and making the edges less sharp. After that I sanded my board by hand with sandpap

Es Hora de Comer - Design Tech Project

Image
       For this project, students were tasked with creating a cutter board of their design. I made a 12x7x0.75 cutting board, composed of three different kinds of wood. For this cutting board, which includes maple, walnut, and cherry wood, I used different machines and tools. First, I cut seven pieces of 1x12 wood strips using a woodcutter and assembled them to create the pattern I liked. I gave the board an aesthetic finish, such as the round sides, and planned the wood to ensure a flat surface.       What I was most challenged by was stepping up and cutting my wood. Although I was well equipt and understood how to approach it, I couldn't help but feel nervous. My favorite part of this process was cutting the first seven strips. The woodcutter can be intimidating because of the blade, and I was quite nervous prior to my work. But after, I had overcome my fear of the machine, and my strips had turned out great! I felt proud of my work and happy about overcoming my fear.       If I