Posts

Showing posts from February, 2022

gorgeous gorgeous girls make cutting boards

Image
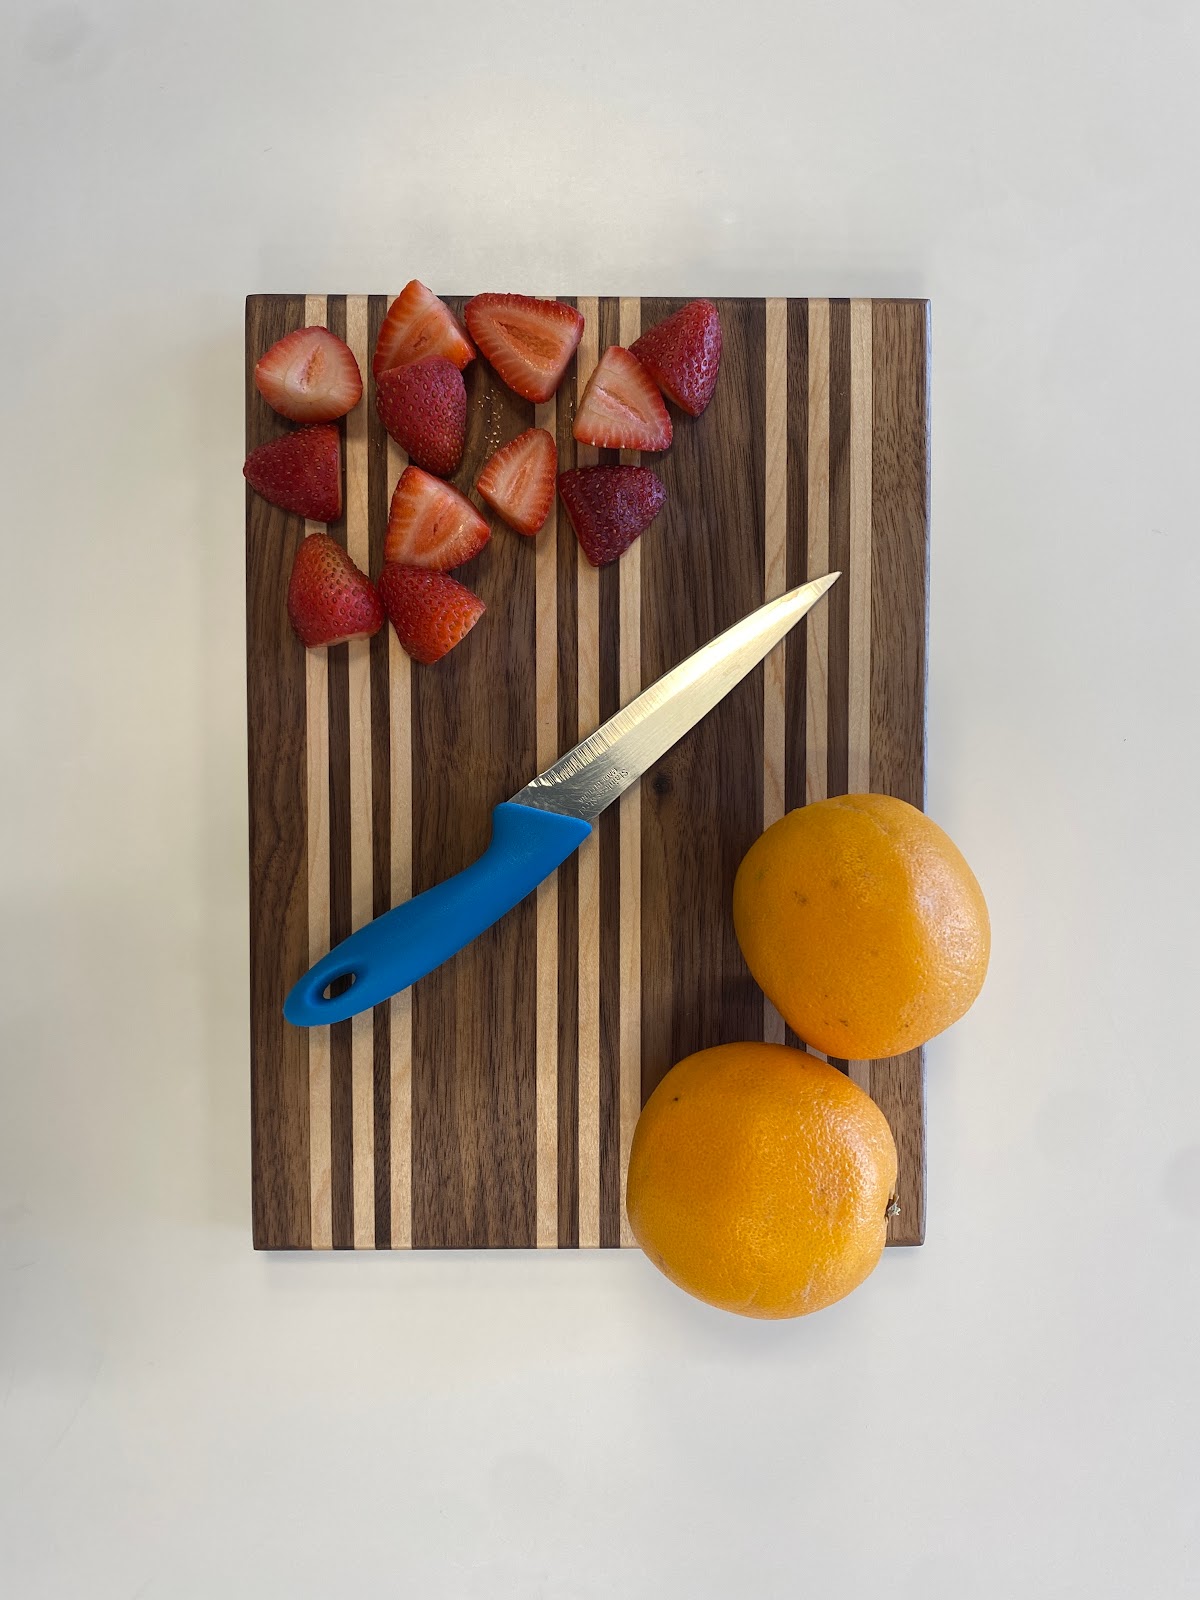
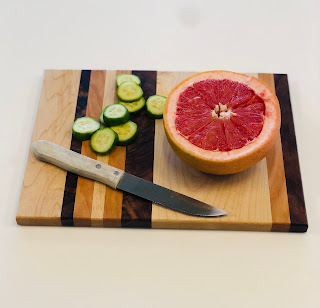
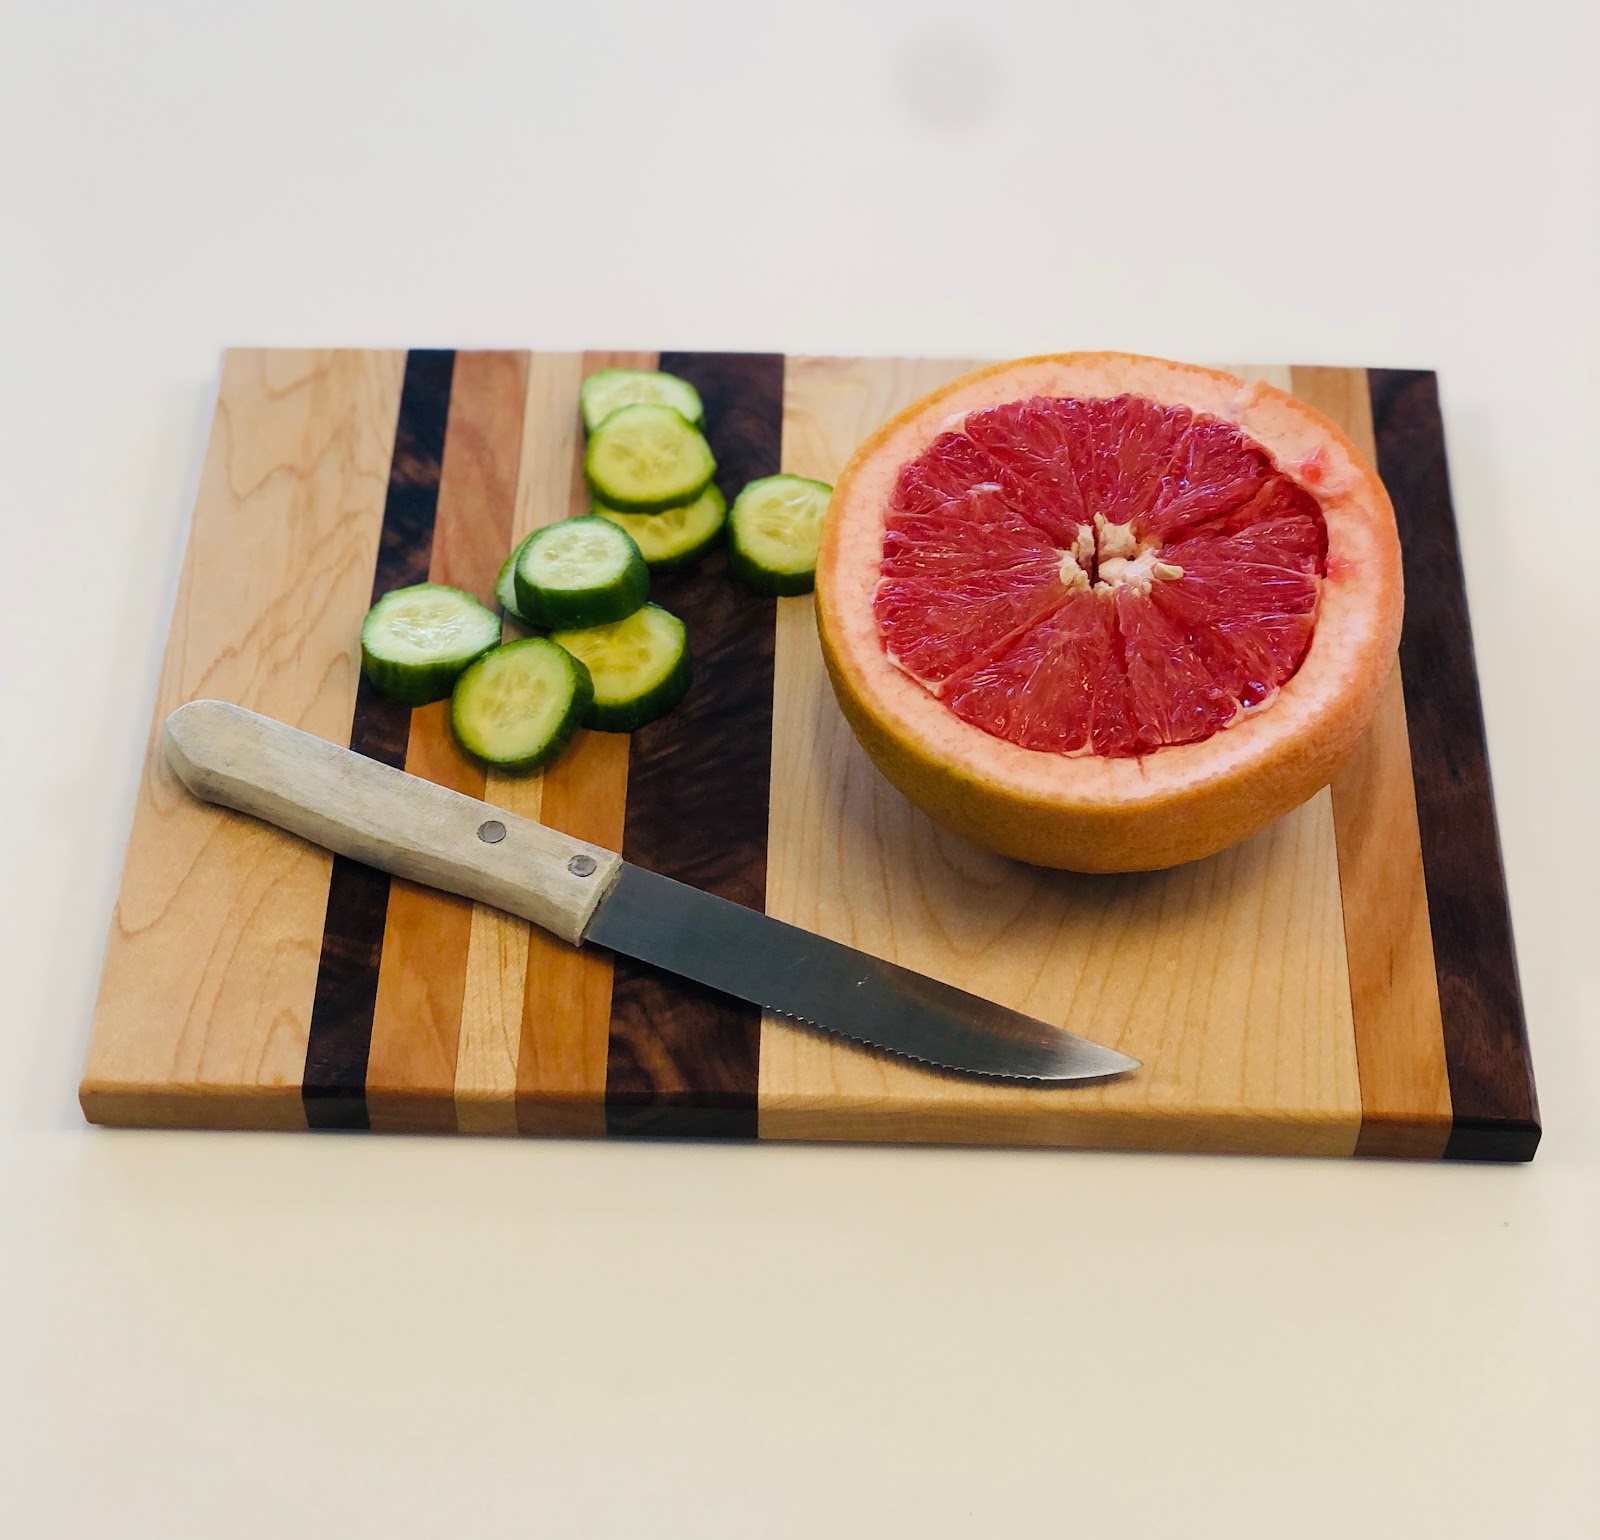
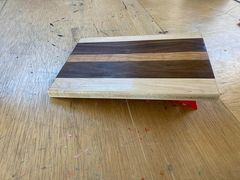
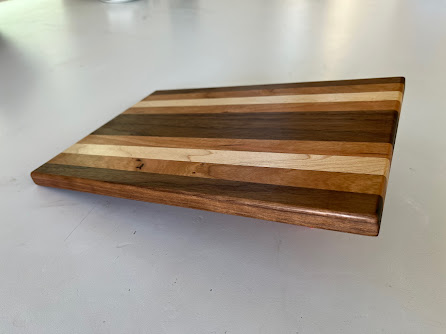
 Natalie Gross Mr. Grisbee Design tech 7 February 2022 Pinstripe Cutting Board   What is your project?      My project is a walnut and maple striped cutting board.  How did you make it?           The first step in making it was drawing a design on paper. This was done with partners, due to the lack of clamps that were needed to glue the wood together at a later step. We decided to draw it at the same size that the cutting board would actually be so that we could fully see what it would look like at the end. We chose a pinstripe design with contrasting maple and walnut woods. Then, after Mr. Grisbee bought the wood for all of us, we measured and cut the wood to size the same way that he had taught us in the class before. The wood pieces were twice the length that the board would be at the end, half which would be for me, and the other half for Sabrina. Once we had all the pieces cut, we applied wood glue to them and pressed them together with the clamps so that there would be no gaps in

Gorgeous Debora the Cutting Board's Identical Twin Sister - Design Tech Project

Image
What is the project? Our project was to design and craft our own cutting board, using both our hands themselves and machines to assist us. How did you make it? The first step was to design what we wanted our board to look like on a piece of paper. We included a cut list and a purchase list of the wood we would need. When the wood arrived, we immediately got to cutting it, using our design measurements for reference. We used the table saw for this step. Once everything was cut, the gluing began. We glued the strips of wood in the preferred order and then proceeded to clamp the pieces together until the glue dried. When the glue had dried, we got off the excess glue and put the long board through the planer (at this point we hadn't cut the board in half to make two boards). The planer sliced off a small layer of the board, making it very smooth. We then cut it in half, producing two boards. The next step was to sand it until it was even smoother and then rout it. This means rounding

Gorgeous Deborah the Cutting Board - Design Tech 2022 Project

Image
For our first design tech project, we were supposed to create a cutting board using three types of wood, and the tools and machines we had available at the high school's tinker lab.  Our cutting boards took seven classes to make. The first steps of our project were to pick a partner, draw a template of what the design would look like, and make a list of all the wood materials we would need. We had choices between three types of wood: maple, cherry, and walnut, each of which I used in my cutting board. I worked with Sophia O. to build our cutting boards.  After our wood arrived, we spent a class period cutting it into pieces that would fit together into our design. We glued the pieces together and planed the board, and then we sanded it down. After we sanded it for the first time, we used a router to round the edges of our boards, and then sanded them some more. After our last sanding was done, we went outside and used finishing oil to glaze our boards, which made the wood look more

Small to Big Cutting Board - Design Tech Project

Image
Sienna Kissack Design Tech Mr. Grisbee February 07, 2022 Small to Big Cutting Board Reference Photo for Our Cutting Board What is your project? In Design Tech, our group made cutting boards out of three different wooden planks. My cutting board was made out of Walnut and Maple wood. How did you make it? I made this cutting board by grouping up with Gloria and drawing out how big we wanted it and how wide. We chose to use Walnut and Maple wood, and used a ruler to measure out how big we wanted our planks to be. Once we measured our wood, we cut them and glued them together in the style we wanted. We used clamps to make sure it was secured and glued correctly. Once our wood was glued, we used a Plainer to make our wood smooth and have the same thickness. We then cut it in half and proceeded to add a chafer to our board and sanded it down. Lastly, we added the finishing to make the color pop and make it more durable. What do you like most about your project? What I liked about making this

Natural Beauty!☺️

Image
The first project in our DEsign tech semester was creating an original cutting board. I teamed up with Sienna to create our amazing, stunning, project. We started by choosing the different wood we wanted to use. We decided on using maple and walnut wood. Next, we looked for a reference picture that we wanted to use for our cutting board pattern. Here is the picture we referenced. Let’s just say it didn’t turn out exactly like our reference but it’s still acceptable. This is what our board turned out as! The next step was measuring and cutting our wood planks. The most difficult part of this process was using the saw. It made me very uncomfortable when I first worked with it. To be honest, it was kinda scary but after I tried it a couple of times of using it I gained more confidence. After cutting our wood pieces we glued them together, making sure they are pressed together to not form any cracks. We let the wood sit for a couple of days to make sure it was all stuck together,

Pinstripe Inspired Cutting Board

Image
Sabrina Gubbels-Wingo Mr. Grisbee Design Tech 07 February 2022 Pinstripe Inspired Cutting Board What is your project?  My project was a cutting board inspired by a pinstripe design. The light stripes are made of maple wood and the darker stripes are made of walnut.    How did you make it?     First, we made our to-scale design on a piece of paper, specifying how much and what kind of wood we needed. Once the wood was in we cut it to width and glued it together. When the glue had dried we scraped off the excess and planed it. This insured that the board was level and fairly smooth. After this, we cut the longboard in half to make two smaller ones. To smooth it out further we sanded the surfaces, making sure to go with the grain to avoid any scratches. We then we routed the edges to round them off and completed sanding. When the sanding was complete we applied the first layer of finishing oil. We waited for this to dry for a few days and then came back and burnished the board with some s

Interlocked For Life - Cutting Board Project

Image
   Interlocked For Life Cutting Board Aiden Cunningham What is your project? My project is an end-grain cutting board made from interlocking pieces of walnut and cherry wood at alternate lengths, which I think will not only make the cutting board better for my knife, but will also make it stronger and able to withstand more constant use. How did you make it? We took two boards, one 3 inch wide cherry board and one 5 inch wide walnut board, and glued them together to create a very simple two-colored cutting board. We then cut this design width-wise into 14 3/4 inch pieces, but mine ended up being 13 pieces because Nate broke one. We then flipped every other piece around and glued them together to make the nice interlocking design you see in the pictures. We then went through the process of sanding, buffing, and glazing to bring out the rich colors in the wood and to make it nice and smooth, and that was it, we were done! What do you like most about your project? I like the uniqueness o

The best of all three worlds/woods

Image
What is your project? A wooden cutting board using 3 different types of wood How did you make it? By cutting different wood types, which include cherry, walnut, then we started lining them up together, then gluing them together. We let the glue rest over the weekend in a large wood clamp to let the glue dry in the perfect shape and to keep it flat. When we arrived back, we scraped off the dried excess glue and began rounding out the edges and flattening the top off to give it that smooth and shiny professional cutting board look. After rounding it out and smoothing off the top, we covered it in the first round of finishing oil, and then let it rest and absorb it. When we came back to class, the finishing oil had been absorbed, and we then burnished the wooden boards with a ball of super fine iron wool. Our final step requires us to finish the board with more oil, but after this final step, our board is done! What do you like most about your project? I really love how the different colo

"The Imperfect Symmetry" Cutting Board Project

Image
 Alexandre Maciel Mr. Grisbee Design Tech February 7, 2022 The Imperfect Symmetry What is my project? My project is an 8x12" cutting board made of Walnut, Cherry, and Maple pieces of wood.  How did I make it? First, I made a design on a piece of paper that consisted of the design for my cutting board, the types of wood used, and what measurement I would have to cut out. When we got our 3 pieces of wood, we used a table saw, in order to cut out the designed pieces of wood. We then glued them and used clamps in order to make sure that the wood is perfectly connected. Then, I placed it through the planer in order to make the wood pieces the same height and cut off the edge pieces that were longer than the main piece. We then used the routing machine, in order to give my board better edges, and followed up by sanding it, in order to make the board smooth. After it was smooth, we used "Tried and True Wood Finishes" in order to give it a more sticking appearance.  What do I li

The Zipper - Cutting Board Project

Image
Cutting Board Project - By: Nate Savarese What is your project? - I Made a walnut and cherry interlocking cutting board. How did you make it?   - We Started with two boards, one shorter than the other, cut small pieces out and glued them together in an interlocking pattern. We made each strip 3/4 inch wide and flipped them around to make the pattern. We then put the unfinished board through the planer, and router, as well as sanding it, buffing it, and polishing it. What do you like most about it? - I really like the contrast of the dark colors and how they work off of each other to make each other look even better. What was a challenge you encountered?   - Using power tools because they are very powerful., What would you change about your project if you were to do it again? - I would have done fewer cuts and made more simplistic designs What is your plan for it now that your done? - Cut food

tricolor cutting board

Image
  What is your project? My project is a wooden cutting board with three different types of wood, cut and glued together.  How did you make it? The very first thing I did was plan out a design and a blueprint for my cutting board. Evan and I brainstormed on what woods we wanted to use, the design, and the length. We both agreed easily on the design we wanted which was nice. When our woods came in, we got a lesson on how to cut. The hands-on part of the project was definitely one of my favorite parts. The table saw intimidated me at first, but then I got used to it. After the cuts were ready, we got to gluing. This was a bit complicated because when the glue dried we had to scrape it off for the wood to go through the planer. The planer makes the wood all the same on the surface. After the planing, we were satisfied with the board we cut it in half and started sanding. This was a bit tedious but the result was definitely worth it. Then we went through the multistep process of oiling and