gorgeous gorgeous girls make cutting boards
Natalie Gross
Mr. Grisbee
Design tech
7 February 2022
Pinstripe Cutting Board
What is your project?
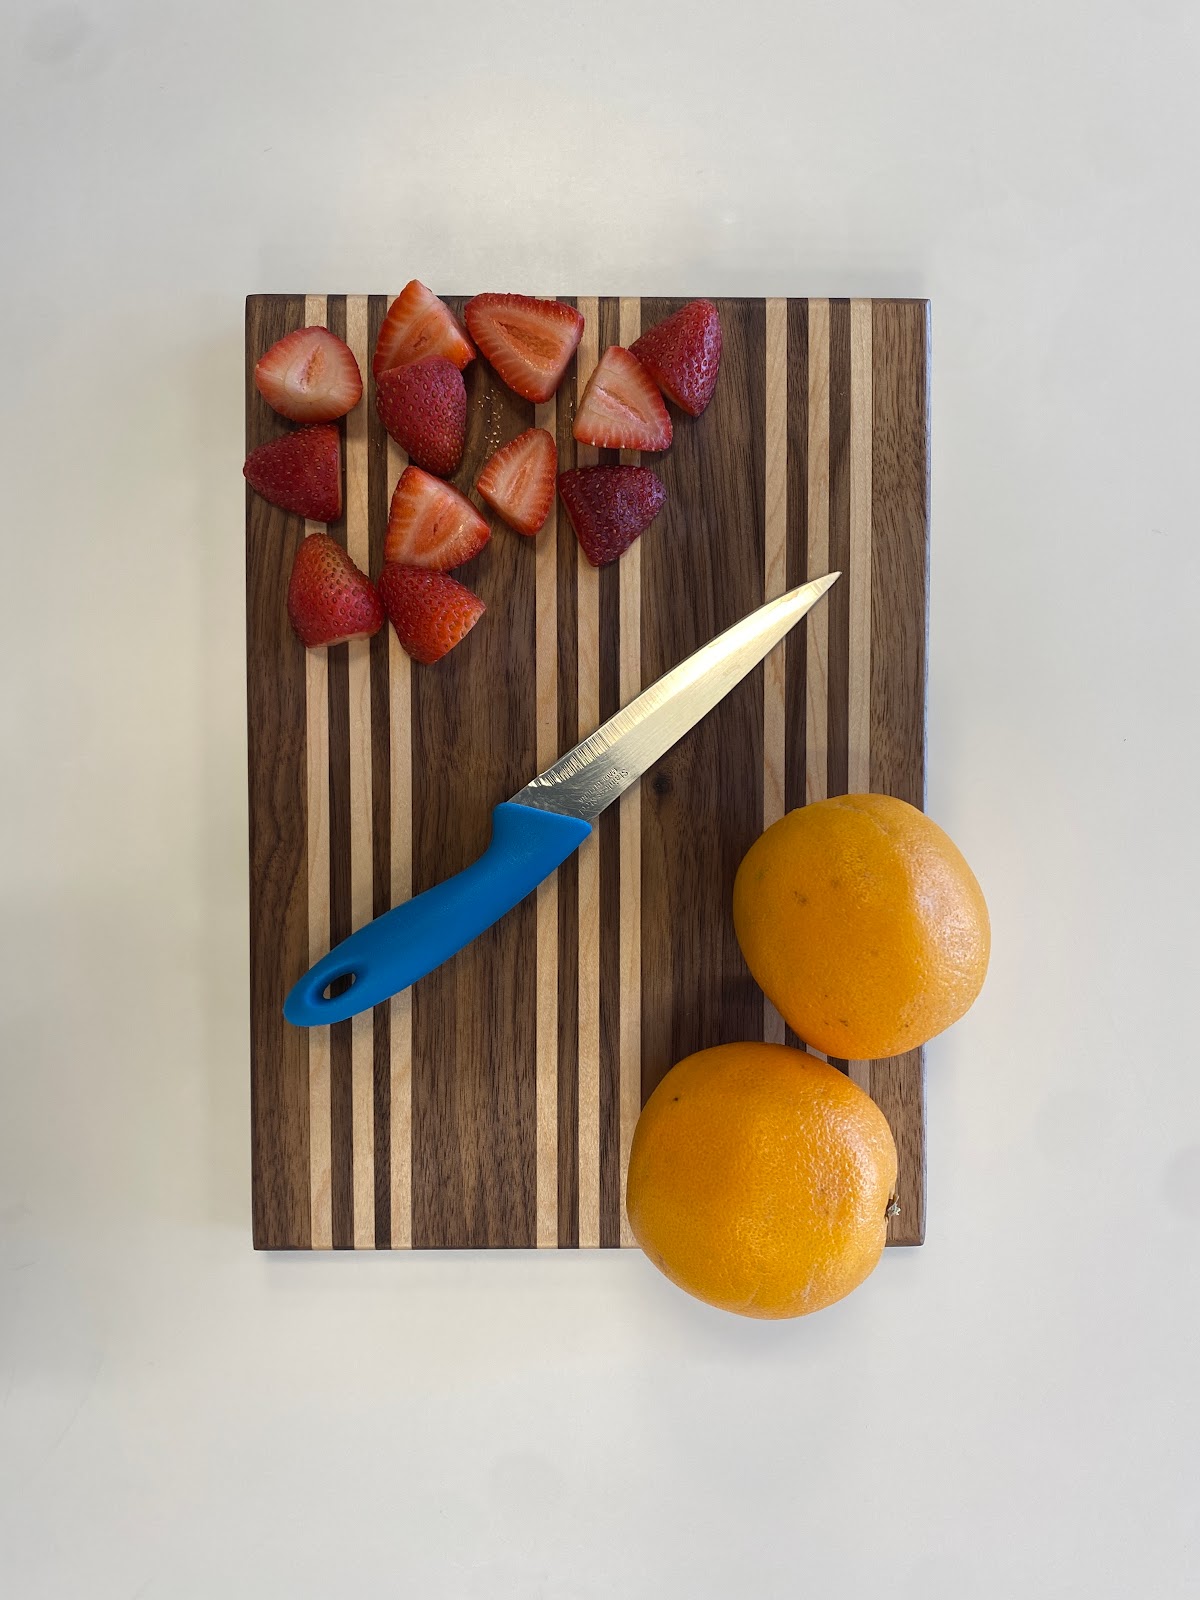
My project is a walnut and maple striped cutting board.
How did you make it?
The first step in making it was drawing a design on paper. This was done with partners, due to the lack of clamps that were needed to glue the wood together at a later step. We decided to draw it at the same size that the cutting board would actually be so that we could fully see what it would look like at the end. We chose a pinstripe design with contrasting maple and walnut woods. Then, after Mr. Grisbee bought the wood for all of us, we measured and cut the wood to size the same way that he had taught us in the class before. The wood pieces were twice the length that the board would be at the end, half which would be for me, and the other half for Sabrina. Once we had all the pieces cut, we applied wood glue to them and pressed them together with the clamps so that there would be no gaps in the board. After the glue had dried all the way, we used a paint scraper to get the access glue off of the board. We then learned how to use the planer and passed the board through that a few times to make it flat, because not all the wood was even after we glued it. We cut the board into our two individual boards and evened out the sides after that. we had to take into account the 1/8 inch that the blade would cut off in order to make the two even. Mr. Grisbee taught us to use the router so that we could round out the edges to make it have a more finished look. We got to choose the amount that the router would take off and passed it through. Once this was done, all that was left was the sanding and finishing oil. For the sanding, we started off with 150 grit and then went to 220 grit to make it smoother. Finally, we applied to finish oil twice, with a round of burnishing with steel wool after each layer. Then we had our cutting boards!
What do you like most about your project?
My favorite part of making the cutting board was cutting the wood. I loved being able to actually cut it instead of just being given wood that was already cut the size we needed.
What was challenging about the project?
The most challenging part of the project was scraping the glue off. The wood glue is very strong and, in the spots where it was thinly spread, it was very difficult to get it off without accidentally scraping pieces of wood off as well.
What would you change about the project if you did it again?
I would probably put less glue on the wood pieces so that it would be much easier to scrape it off when it comes time to.
What is your plan for it now that it's done?
My plan is to use it as a charcuterie board because of how pretty the design is.


Comments
Post a Comment